
Facebook started in 2004, and almost everyone is using Facebook for posting and sharing their images with friends and family. Facebook is a prominent social networking website, although it is always better to backup your Facebook account data instead of relying on it.
Due to the increase in security attacks, it is also a good reason to back up your Facebook data before you lose it. Moreover, we cannot ignore the possibility of the account being deleted by you or someone else intentionally or accidentally.
Facebook already has this feature available under the setting page, allowing you to take a backup of your Facebook account. With this backup feature, you can download your uploaded photos, videos, contacts, and other information on your local system.
Using this backup feature, you will be able to backup your Facebook account with the followings:
- Backup Facebook Photos and Videos
- Posts, Chat Messages, Comments, Likes & Reactions, and other Profile details.
- Backup all your contact details and other data like Pages, Location, Groups, Followings, Connections, Logged Information, Security and Login Information, Ads information, etc.
Below are the steps to backup Facebook photos, videos, and other data:
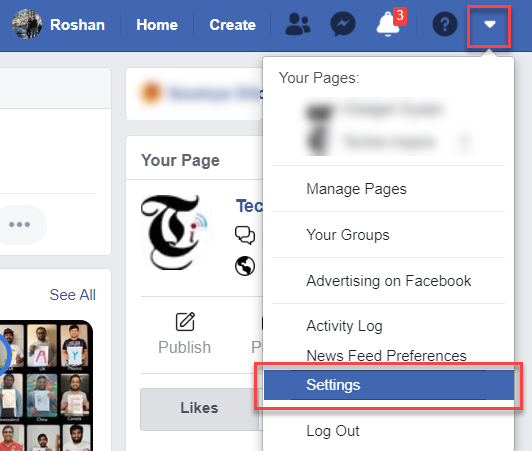
- Log in to your Facebook Account and Navigate to “Settings.”
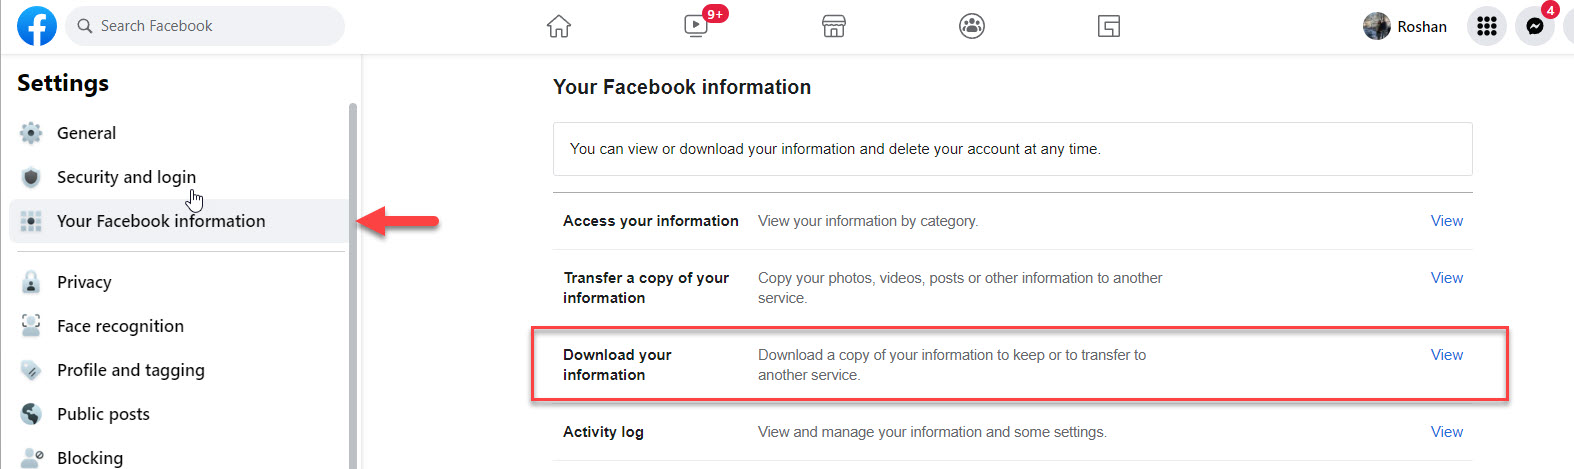
- Click on “Your Facebook Information,” go to “Download your Information,” and click on the “View” button.
- By default, the page will show the Request a Download page.
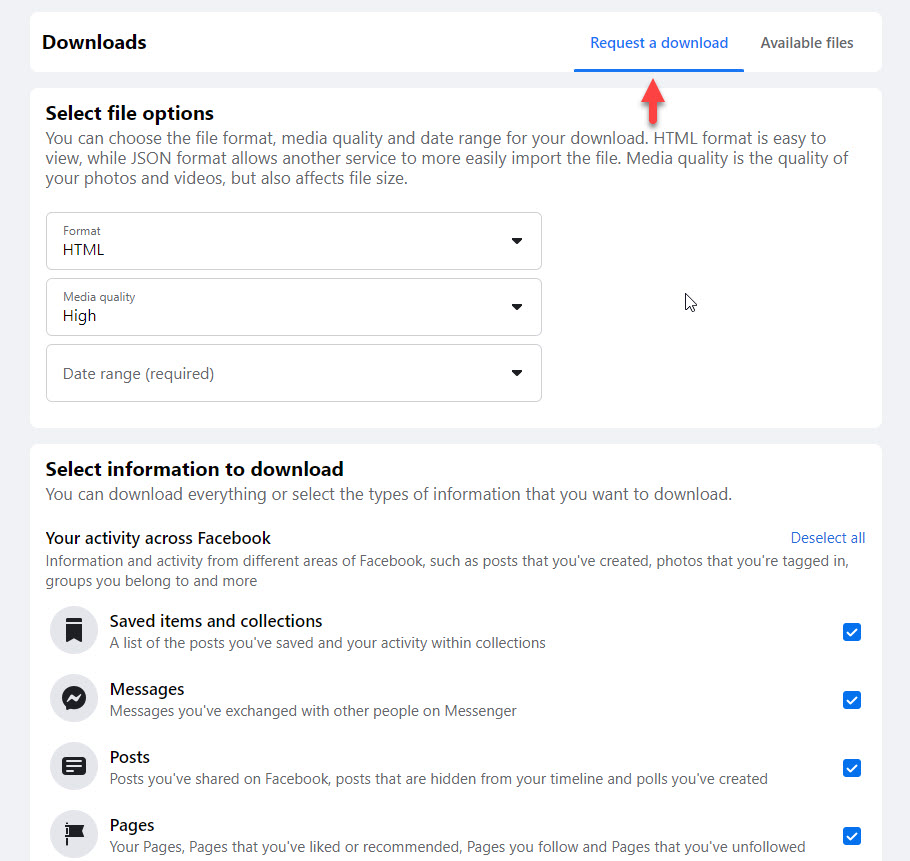
- Here, you can select “HTML” or “JSON” under the Format drop-down. HTML format will be good if you want to download it on your system, and easily viewable offline. In comparison, JSON format is required when you want to import your Facebook data to another service provider.
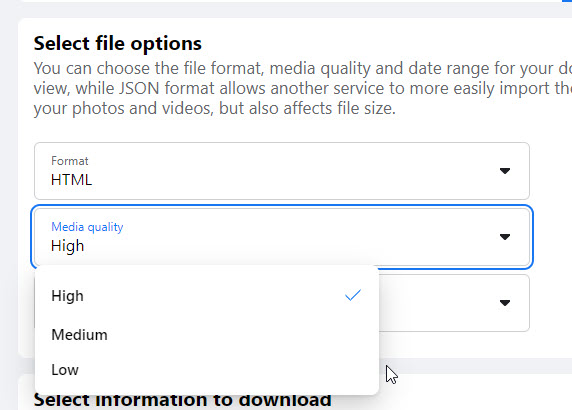
- Under Media quality drop-down option, select the quality of media from High, Medium, or Low.
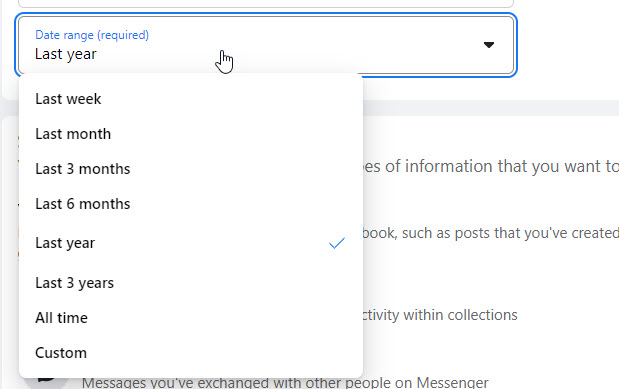
- In the Date Range drop-down option, select the time period from the given option.
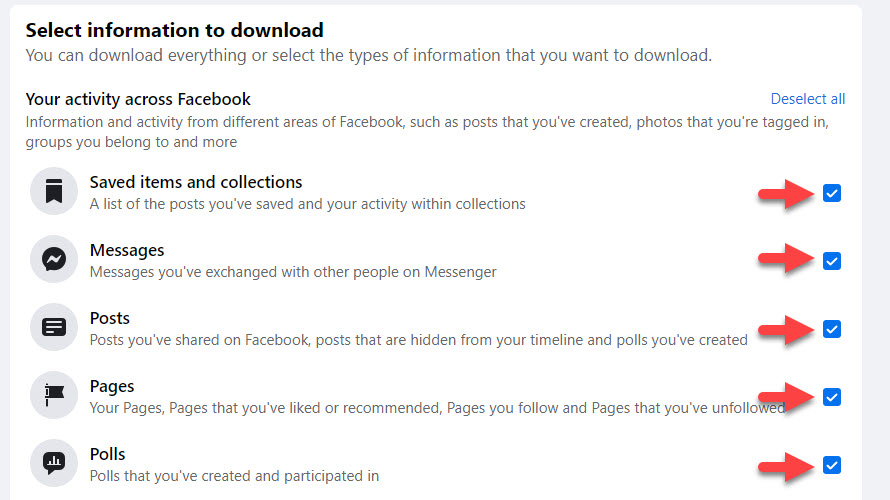
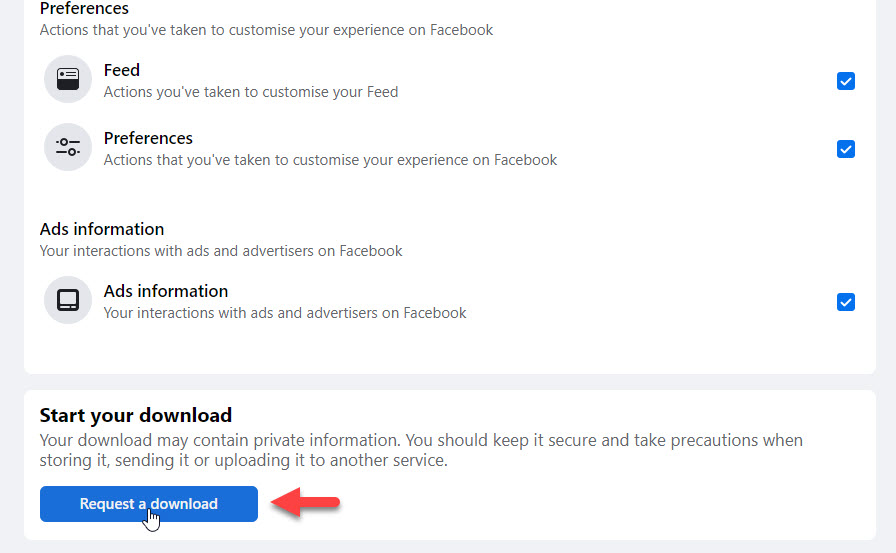
- Click on the checkbox to select or deselect the data you want in your backup file to download.
- At the bottom of the page, click on the “Request a Download” button.
Step 4: Navigate to the “Available Files” tab.

You may notice that the download request may show in Pending status.
Once the file is ready, you should receive an email notification from Facebook to download it. Also, under the Available Files tab section, it will show a button to download the file in ZIP format.
Please note that you may not get download detail immediately, as creating a backup file will take time, considering the amount of data you have in your profile.