Facebook has been introducing many new features on the social network. The feature which was most talked about and got more attention was the Facebook Timeline. Previously this feature wasn’t available to all users but there were different ways to get the new Timeline feature enabled in your Facebook profile. I had also written an article on How to Enable Facebook Timeline before Facebook released this feature live. However, this feature is now live and made it available to all worldwide users.
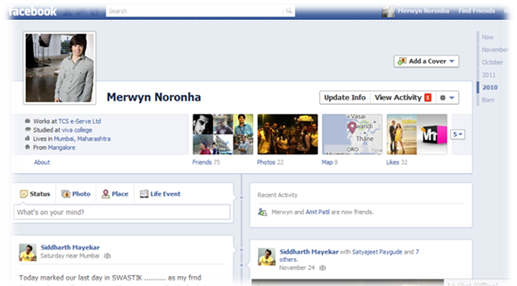
I have been using the Facebook Timeline from sometime and it is quite interesting. The Facebook Timeline has a bar on the top section which has the dates. You or any of your friends can browse your Timeline easily by clicking on any of the months and get the information about you or what were your status updates and activities performed in that particular month. You can also add status, photo, place and events of your past using the Timeline.
To enable the Timeline feature in your profile you can go to Facebook Timeline page and click on “Get Timeline” button. A new profile page appears. At the top section of your Facebook profile you will see ‘Take a Tour’ button. By clicking on this button, you will be able to take a look at all of the features of the new profile page.
If you wish to enable the Timeline in your profile, you can click on ‘Publish Now’. Please note that once you click on ‘Publish Now’, you cannot get back to your old profile page. So if you like your old profile page just don’t click on ‘Publish Now’.
Congratulations, you have successfully enabled the Timeline in your Facebook profile. Once enabled, the Timeline feature in your profile looks as such:
 Techie Inspire – The Technology Blog


