
Do you want to restrict someone from writing files from your computer to an external or USB Drive? Fortunately, Microsoft Windows 10/8/7/XP does come with a write protection feature, which will prevent users from copying or writing content from their computer to an external USB Drive.
Every person wants to keep data on their computer safe from unauthorized access. Even though Windows security is robust but in case your access gets compromised, and someone gains access to your system, all your sensitive data on your computer is at risk of getting copied to External Drive.

Many companies use a pervasive approach to protect their data or documents from getting copied by disabling writing to USB drives. In this article, we will see how you can enable USB write protection on your Windows.
There are two ways that you can disable USB writing on your computer. The first method is a Registry edit trick to enable USB write protection, and the second method is through Group policy editor.
Enable USB Write Protection – Registry Editor:
1. Open the Run dialog box, press Windows Key + R. Type regedit in the Run box and click on the OK button to open Registry Editor.

2. Navigate the following path.
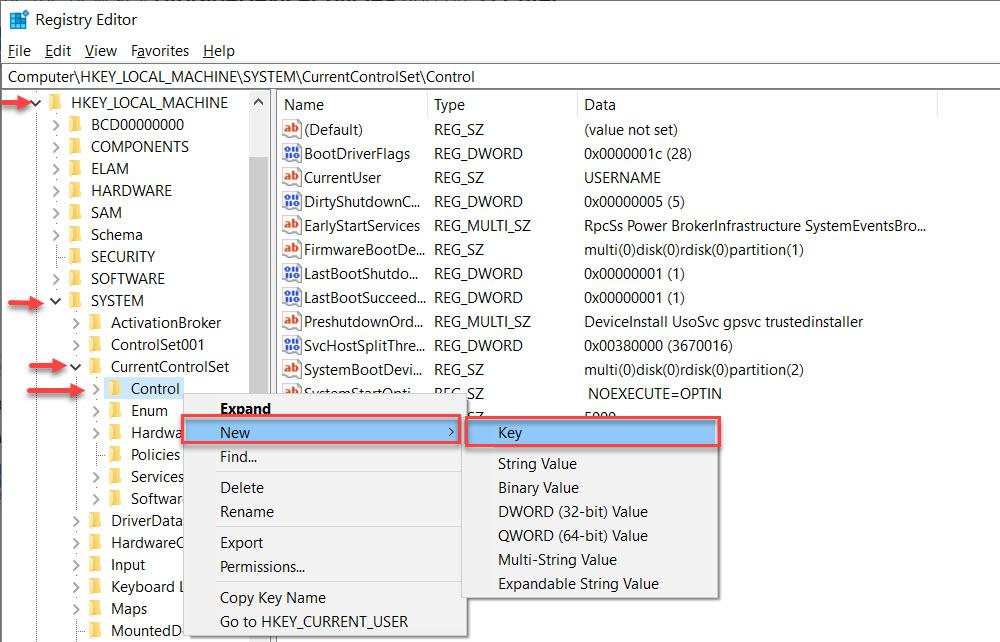
HKEY_LOCAL_MACHINE\SYSTEM\CurrentControlSet\Control
3. Right-click on Control folder Key, select New and click on Key.
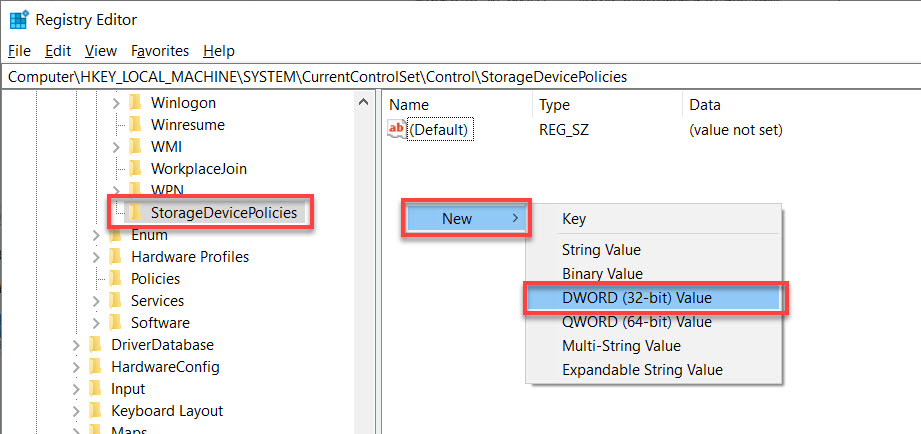
4. Enter new Key name as “StorageDevicePolicies ” and press Enter key.

5. Click on the “StorageDevicePolicies” key, and right-click on the right pane, select New, and click on DWORD (32-bit) Value. Enter the new DWORD name as “WriteProtect ” and press Enter Key.
6. Double Click on the “WriteProtect” DWORD and change its value from to 0 to 1 and click on OK.

DWORD Value = 1 – To Enable USB Write Protection
DWORD Value = 0 – To Disable USB Write Protection
However, the above process is a little cumbersome, because every time you need to change the registry value to change access rights. Therefore, we have created a registry file, which will allow you to enable or disable USB write protection on the Registry Editor just by double-clicking the reg file. Please click on the below link to download the .reg file.
Enable USB Write .reg file download
Disable USB Write .reg file download
Enable USB Write Protection – Group Policy Editor:
if you are not comfortable with modifying the registry then you can try this method to make your USB write-protected.
1. Open the Run dialog box, press Windows Key + R. Type gpedit.msc in the Run box and click on the OK button to open Group Policy Editor.

2. Navigate to Computer Configuration –> Administrative Templates –> System –> Removable Storage Access.
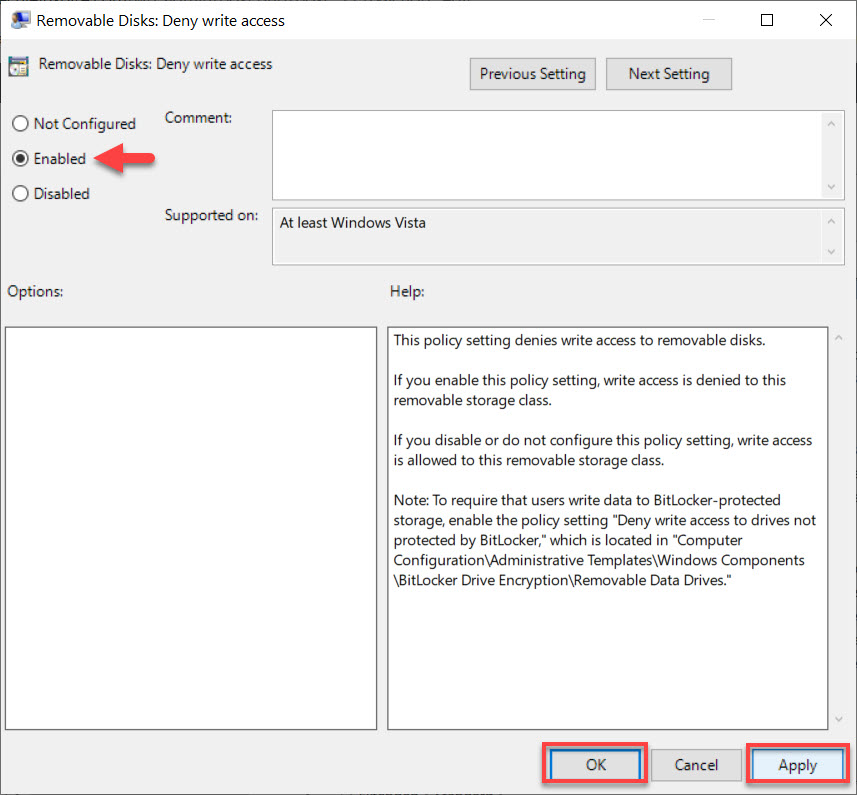
3. On the right pane, double-click on the “Removable Disks: Deny write access” policy.

4. Select the “Enabled” option and click on “Apply” and “OK“.
If you like our work, please share and connect with us on our Social Media.
This is what i was looking for
i think this is most important function and shd be incorporated in windows option, hey k roshan, i found few article where u added an option to remove recycle bin from desktop under folder option menu item, could you add this option to folder option. it would be great if this happens
it shows ur blocked by adminstrotor
You might be running limited account or guest account. Check whether you have administrator rights on your window
There is no StorageDevicePolicies key under Control in Windows 7 Ultimate 64 bit.
@038eda5b8e0651f547798c7c4e5fd073:disqus
If the registry key StorageDevicePolicies does not exist, you will need to create it manually or just download the registry file i.e. Enable USB Write or Disable USB Write and double-click, this will add the key automatically.
Steps to create key manually:
1. Create StorageDevicePolicies key, and then create a New DWORD (32-bit) Value named as WriteProtect.
2. Double click on WriteProtect and set the value to 0 in the Value Data Box and press OK button.
3. Now Restart your computer and try copying files into your USB drives.
Followed the steps. USB still protected. 🙁
Jhustin
USB still protected bcoz you have set the value as 00000001. Please change it to 00000000 to disable USB write protection.
If you still not able to change it, then you can simply download “Enable USB Write” registry file and Run by double click and Restart the system. It will remove the USB write protection.
no dear ,
i have been doing this for several times as you mentioned for withdrawing write protection from my usb drive ,and still fixing the number “0” but it does not have any good result ,,still showing the driver is write protected
@ Rejwan,
I believe that something is going wrong here. Request you to simply download the registry file “Enable USB Write” to enable the writing mode to your USB.
Double click on Registry file and it will automatically the change the value to 0
3.) Now, Double Click on “WriteProtect” change the value data to 1 i.e dword:00000001 , Now its Write Protected.
Value Data =1 – To disable Write to USB Drives
Value Data =0 – To Enable Write to USB Drives
If 1 its write protected but you said that if the data value is 1 it is to disable write to USB.
COnfused.
@disqus_dXrIVE6ZwL:disqus
–> Data value 1 is to disable write to USB i.e. you cannot write anything to USB (USB write protection is enabled)
–> Data value 0 is to enable write to USB i.e. you can now write anything to USB (USB write protection is disabled)